How I made a DIY slat planter on a budget – twice!
This DIY slat planter project is from last year. I’d been seeing those gorgeous modern slatted garden planters absolutely everywhere, but the price tags were honestly wild for what is essentially timber screwed together. Some of the large trough-style planters I liked were coming in at several hundred pounds each, so obvs I decided to have a go at making a DIY slat planter instead. Then… took a year to write up the process! Whoops.
This DIY slat planter ended up being one of those projects that looks far more expensive than it actually was. I used a simple timber frame, lined it with weed membrane and then clad the outside with roofing battens to create that contemporary slatted look.
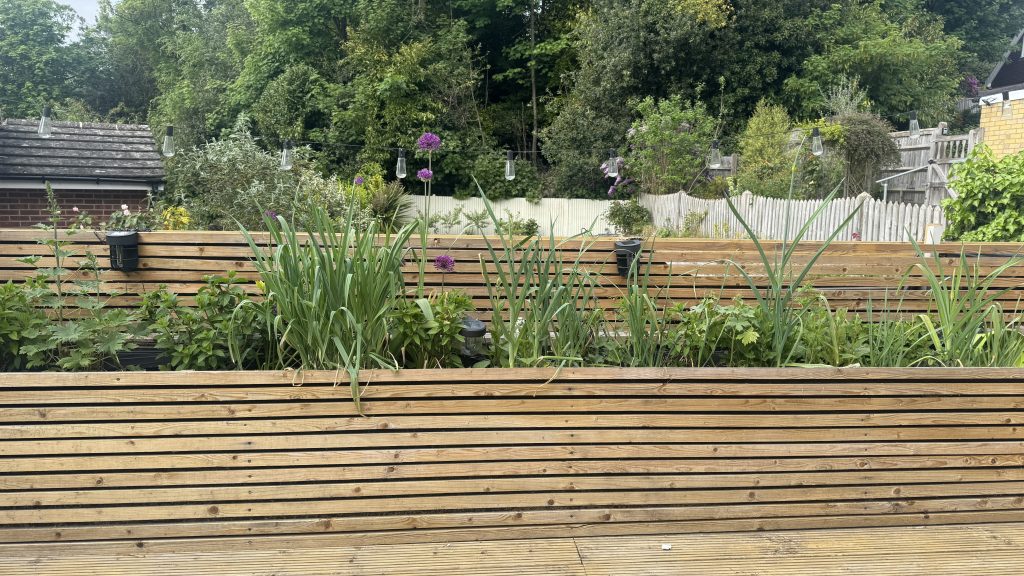
It works brilliantly along a patio edge, as a garden divider or even to soften fencing and hard landscaping. I’ve put them around the edges of our decking area (where I built the slat fences too) and around our resin-bound patio area. Because there are two separate projects, you’ll see the pictures I include in this post are a mix of both and that’s because when I get DIY’ing I sometimes forget to step back and take good images of each step so will take the best / most useful from each project, which hopefully won’t be too confusing!
If you fancy creating your own bespoke on a budget version, here’s exactly how I built mine.
Tools You’ll Need
- Tape measure
- Pencil
- Mitre saw or hand saw
- Drill driver
- Exterior screws
- Staple gun – this is my trusty one
- Spirit level
- Clamps, optional but useful
- Sander or sandpaper
- Paintbrush or paint sprayer for finishing – this is my paint sprayer and it’s amazing
Materials You’ll Need
- Timber for the frame
- Roofing battens for the slatted exterior
- Weed membrane
- Staples
- Exterior wood stain, paint or sealant
- Compost and plants
Step 1 – Measure and plan your planter
Before cutting anything, I worked out exactly where the planter was going and how long I wanted it to be.
Because this design is long and low, it works best when the proportions feel sleek rather than too chunky. Mine was designed to sit neatly along the patio and decking edge and create a more styled landscaping feel without dominating the space.
One of the best things about making your own planter is being able to completely customise the size to suit your space.
Top tip:
Try marking the planter dimensions out on the ground first using masking tape or spare timber so you can visualise the scale properly before building.
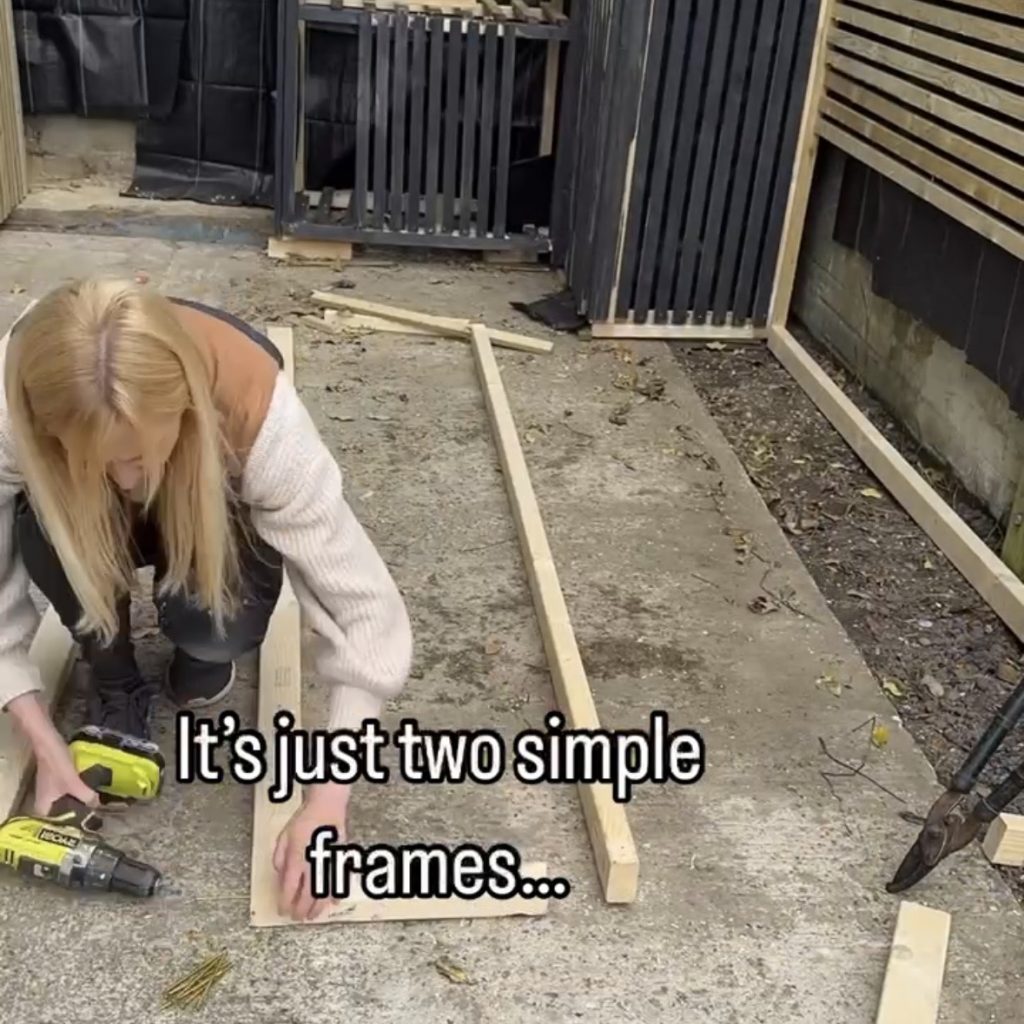
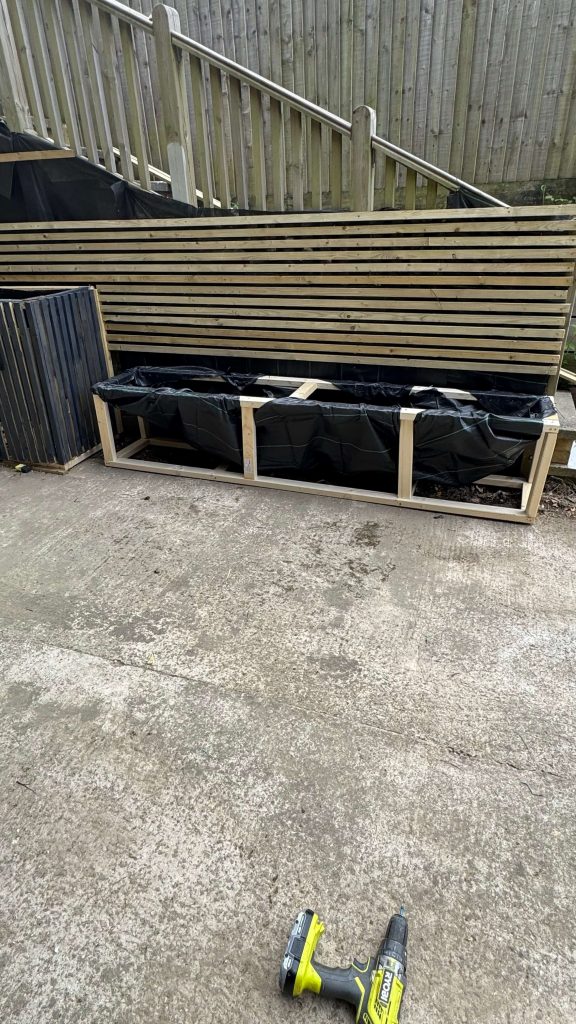
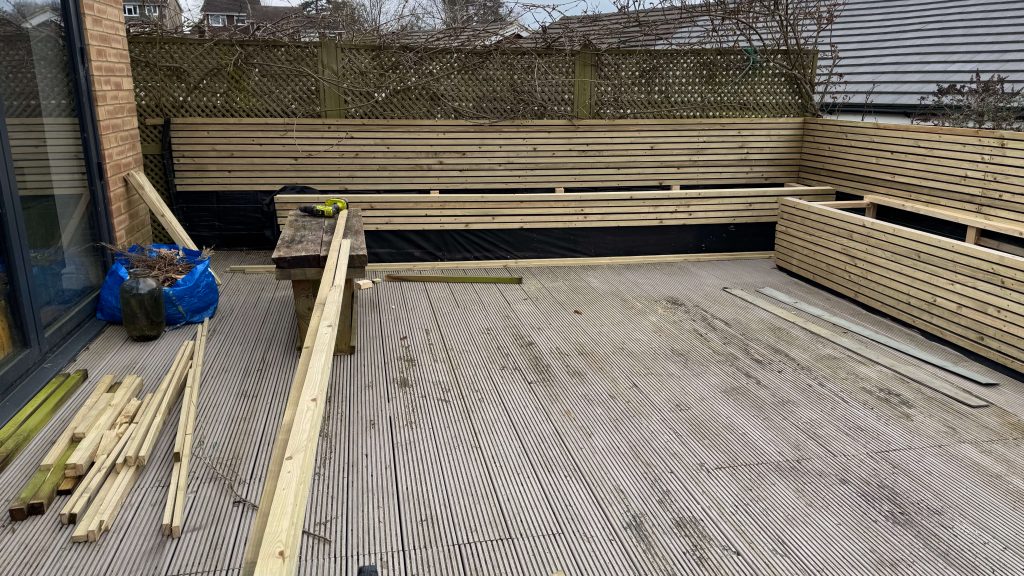
Step 2 – Build The Main Timber Frame
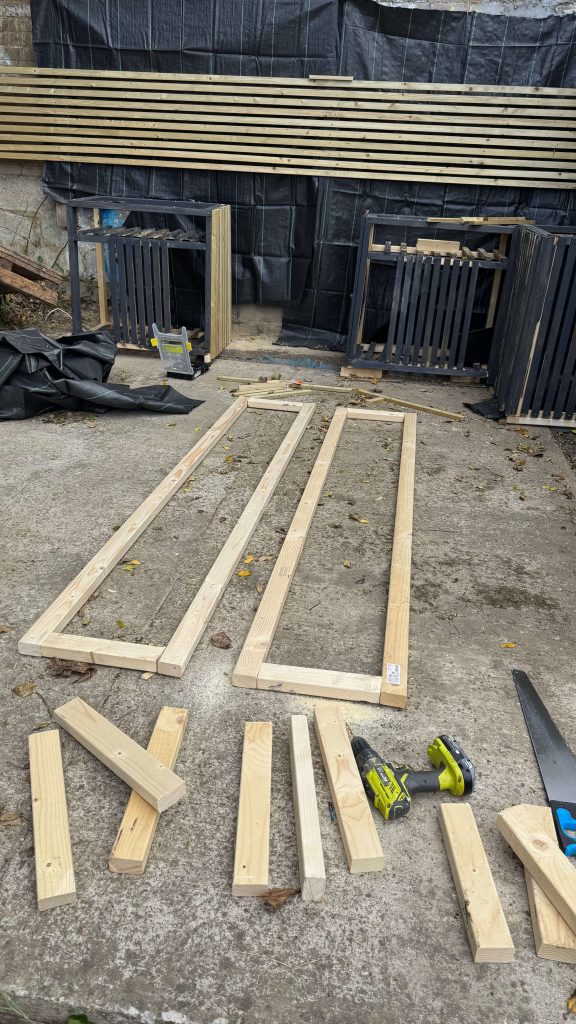
The DIY slat planter structure itself is actually really simple.
I started by building:
- one long rectangular base frame
- one matching top frame
These were made from treated timber screwed together to create the main shape of the planter.
Once both rectangles were complete, I connected them together using upright supports at intervals along the planter.
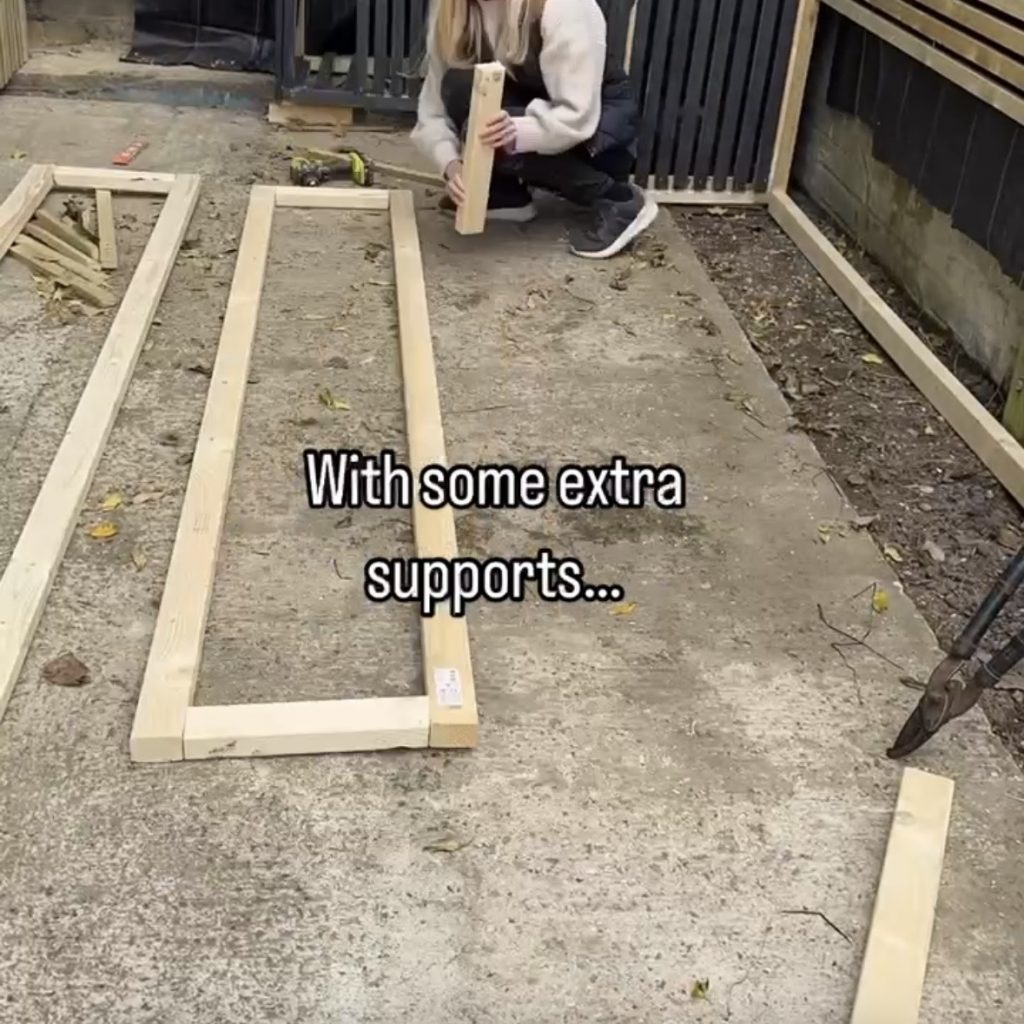
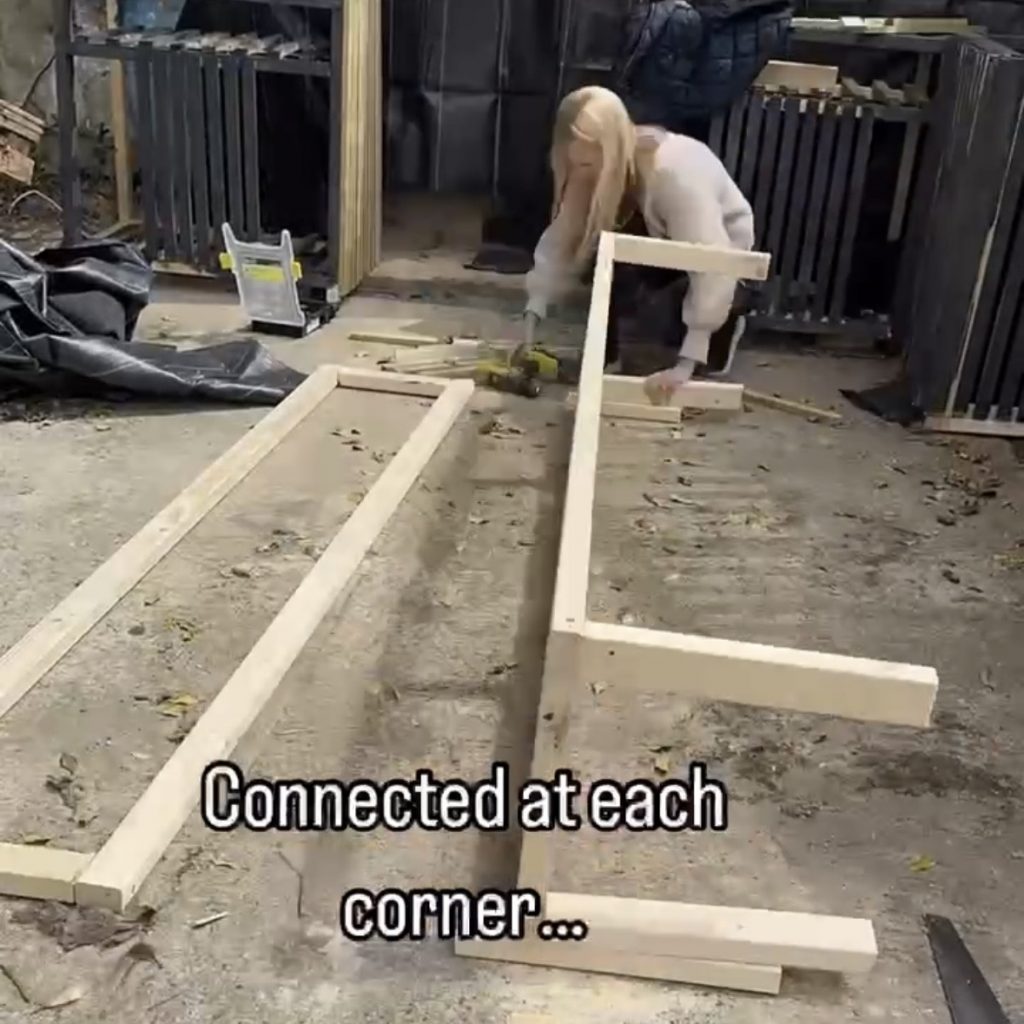
Because the planter is long, I added several extra vertical supports through the middle as well to keep everything sturdy and stop any bowing once filled with compost.
At this stage it basically looked like a long timber box frame and very similar to the frames I built for the DIY fridge housing unit, DIY bin shed, the DIY cabin bed and many other of my DIY hacks (i definitely have a go-to process!).
Top tip:
Build the frame on a flat surface if possible so everything stays square and level.
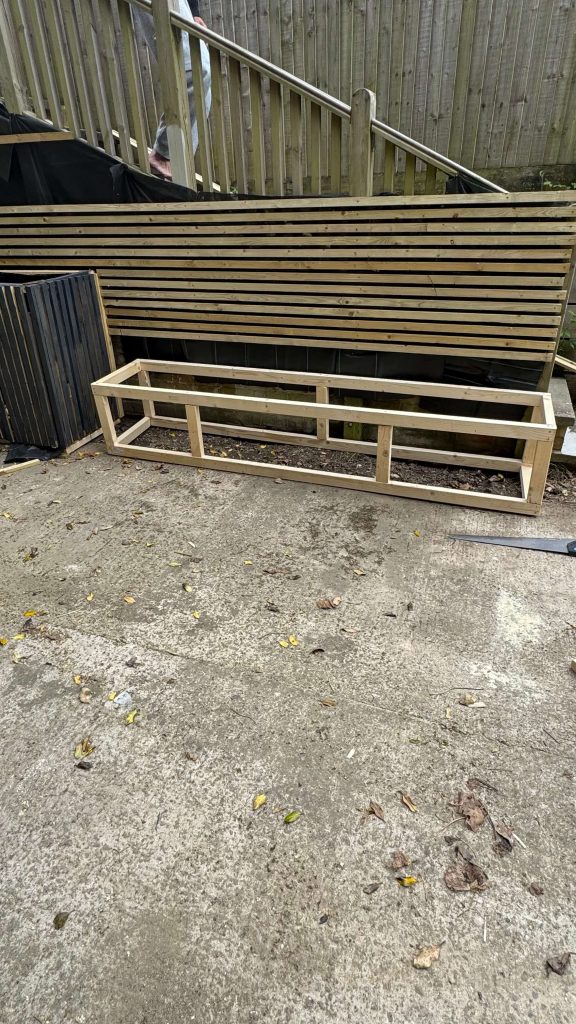
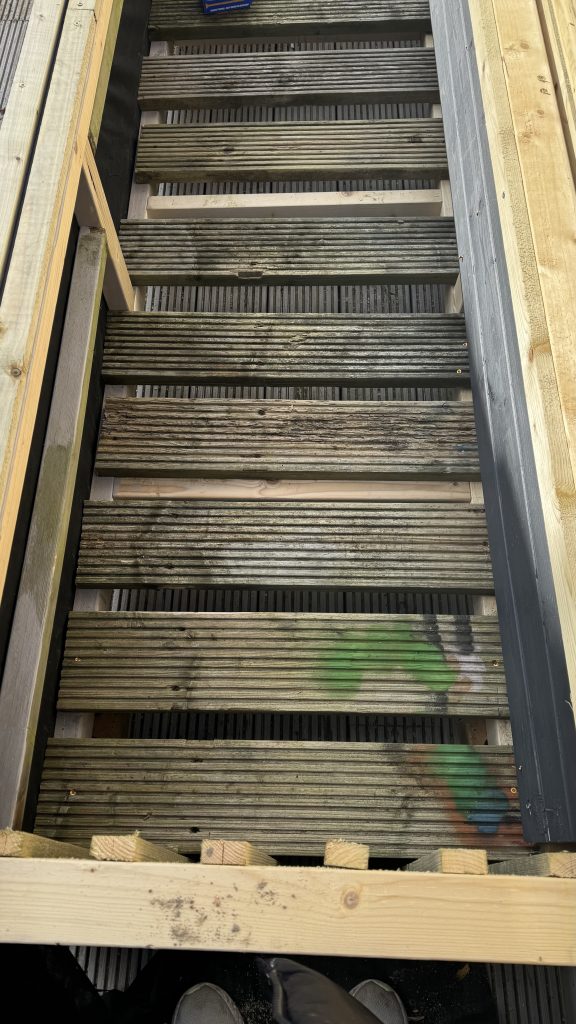
Step 3 – Add The Base Supports
Next, I added additional timber supports across the bottom section of the planter. For the decking project, it was super important that wet soil wasnt ever going to be resting on the decking boards as I knew that would cause them to rot and would be a serious issue so I heavily filled out the bottoms of the planters with repurposed old decking boards and then covered with waterproof sheeting (more on that in the next step). This helps support the weight of the compost and plants once filled.
For the patio, I wasn’t that worried as the base underneath was concrete so moisture would make no difference, so the base was more low key.
I tend to do this, adapt each project for the exact location and purpose and not stick too closely to a script. I find that way you can get the best outcome each time and it allows you to make savings on time and materials where possible too.
If you want to make the planter easier to move later, this is also the stage where you could add hidden castors underneath. Bear in mind that larger planters will be heavy so will need strong castors.
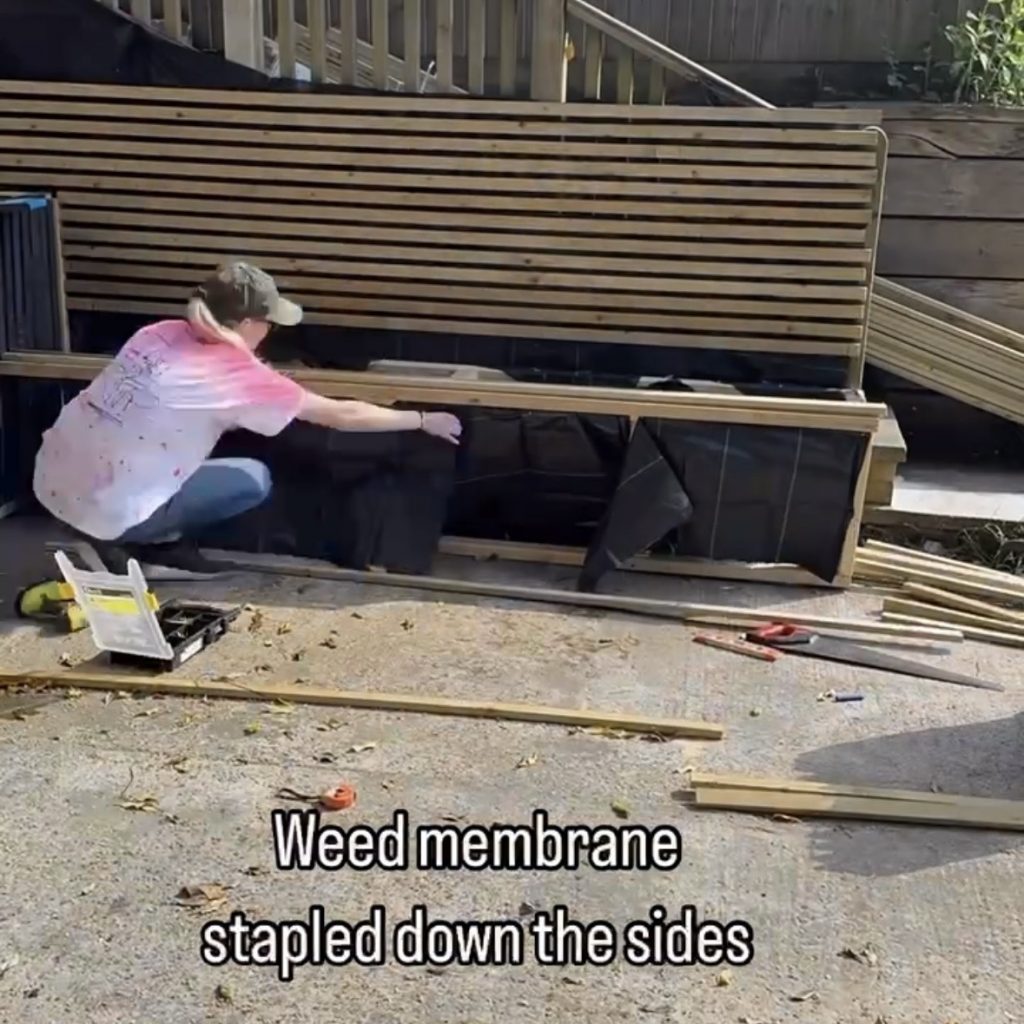
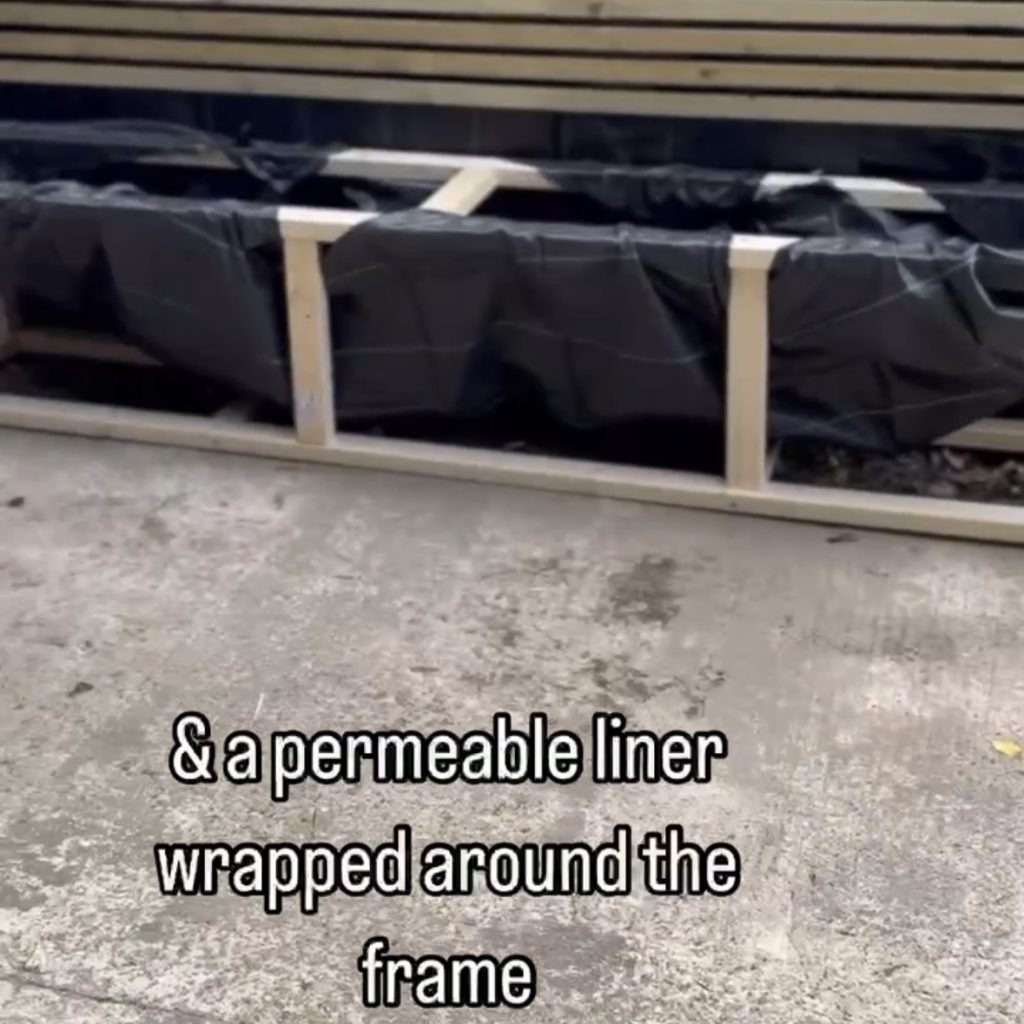
Step 4 – line the DIY slat planter with weed membrane
Once the frame was complete, I lined the inside using weed membrane and stapled it into place using a staple gun.
This step helps:
- hold the compost inside
- protects the timber slightly from constantly damp soil
- allow water to drain properly
I wrapped the membrane neatly around the internal frame before attaching the outer battens.
Top tip:
Do not use completely waterproof plastic with no drainage holes because your plants can easily become waterlogged. Make regular holes in waterproof membrane to allow for drainage.
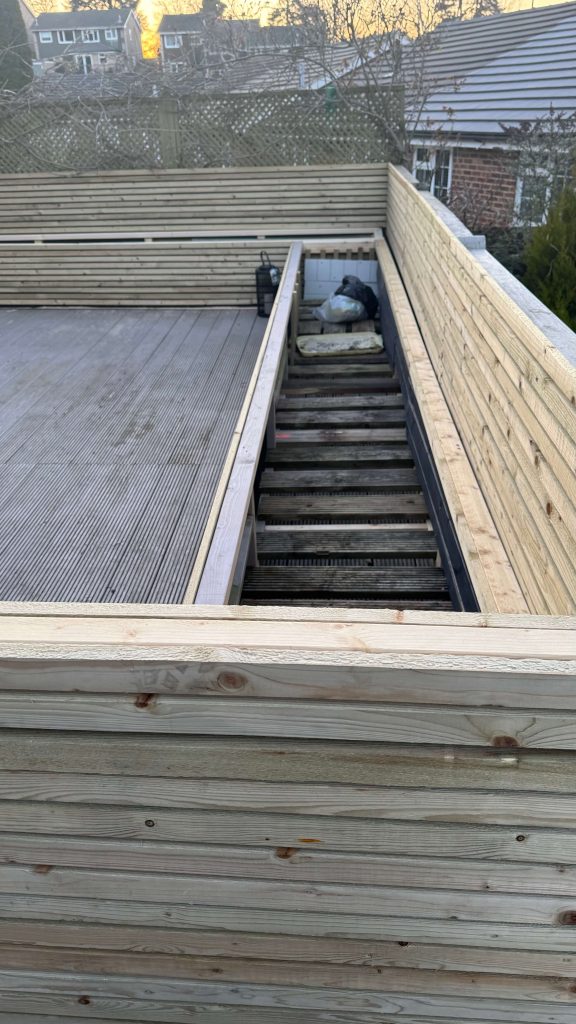
Step 5 – Attach the battens
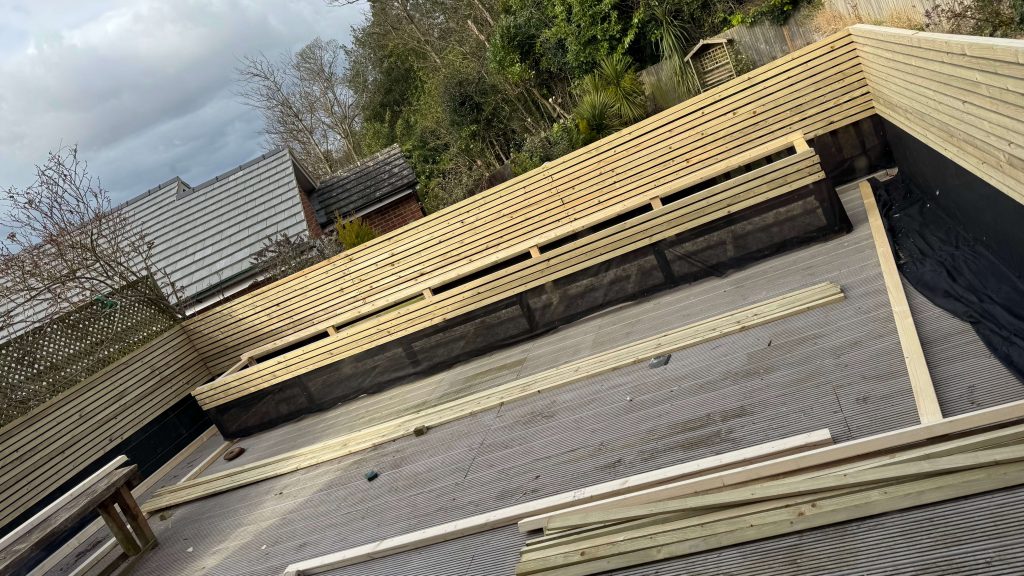
This is the stage where the planter suddenly starts looking expensive.
I used roofing battens vertically around the outside of the planter to create the modern slatted finish.
Starting at one end, I worked my way along attaching each batten individually and leaving small equal gaps between them.
The battens completely transformed the basic timber frame into something that looked much more contemporary and designer-inspired.
Top tip:
Use a small offcut of timber as a spacer between battens to keep your gaps perfectly even the whole way along.
Another top tip:
Pre-drilling near the ends of roofing battens helps stop splitting.
Step 6 – Finishing the DIY slat planter
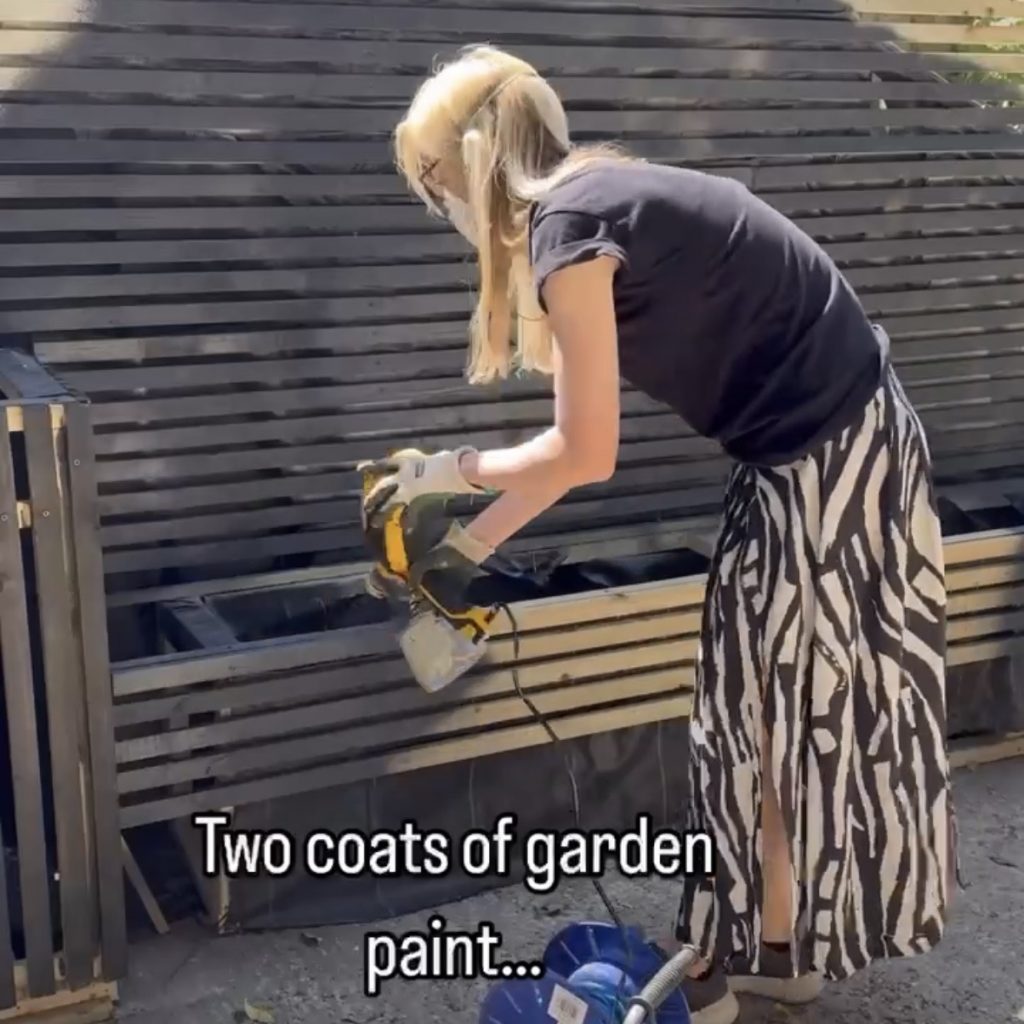
Once all the battens were attached, I sanded down any rough ends. On the decking project, I left the battens in their natural (treated) state as they were waterproof and I wanted a rustic look. On the patio I spray painted them with garden paint and my paint sprayer. I’ll link the exact products below.
Step 7 – Add Your Plants
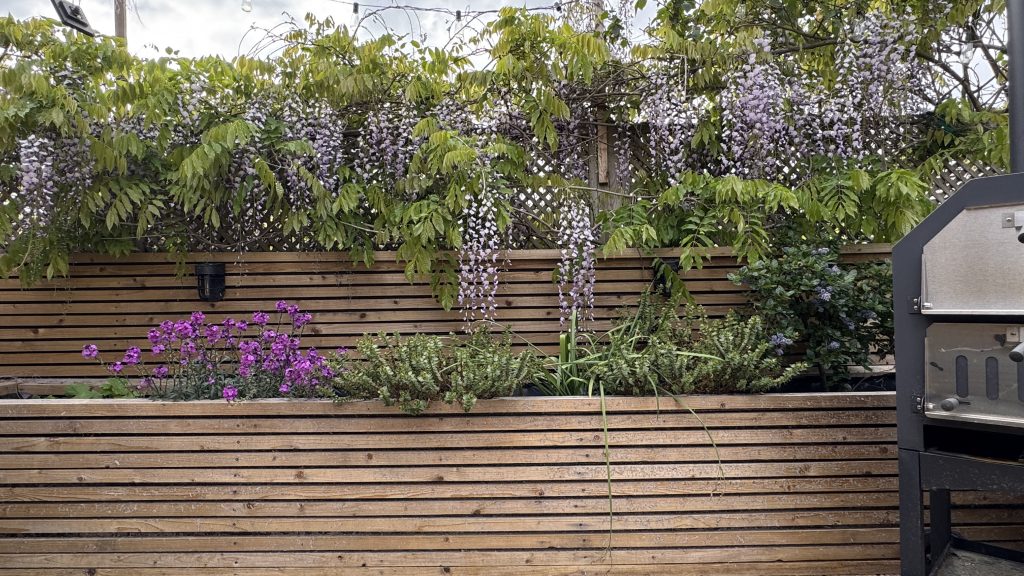
Now for the fun part.
Because this planter is long and low, it works especially well with layered planting combinations rather than one single feature plant.
Some lovely options include:
- ornamental grasses
- lavender
- trailing ivy
- small olive trees
- eucalyptus
- hydrangeas
- seasonal flowers
I always buy reduced plants at the garden centre to save money and have had some fantastic results with potted bulbs from B&Q – gorgeous alliums that have come back this year rather excitingly. I’ve also had really good luck with Asda’s plants and they do a fantastic offer of 3 pots for £5 which is such a great money-saver.
Top Tips For Making A DIY Slat Planter
Use Pressure Treated Timber
This will help the planter last much longer outdoors.
Add Extra Internal Supports
Long planters need more support through the centre to stop movement over time.
Keep Your Batten Gaps Consistent
This makes such a difference to the final high-end look. I like to make a template of the required size with pieces of wood and place them in the gaps each time before securing the lengths.
Don’t Skip Drainage
Proper drainage helps protect both the plants and the timber. I drilled a few holes in the waterproof liner to make sure this was accounted for.
Seal Any Fresh Timber Cuts
Especially if using treated timber outdoors.
FAQs
What timber should you use for a DIY planter?
CLS timber works brilliantly for the internal structure because it is affordable, sturdy and easy to work with.
Can roofing battens be used outside?
Yes, although treating or sealing them will help extend their lifespan outdoors.
How do you line a wooden planter?
Weed membrane is ideal because it helps contain soil while still allowing drainage.
What plants work best in long trough planters?
Grasses, lavender, trailing plants and layered seasonal planting all work beautifully.
Is it cheaper to build your own planter?
Definitely. Large slatted planters are often extremely overpriced, especially contemporary styles.