How to build a DIY porcelain patio with Tile Mountain: a step-by-step guide
Building a DIY porcelain patio might sound like a daunting task, but I found, with the right prep, materials, and method, it’s a project you can definitely take on yourself. If you’re using porcelain paving slabs from Tile Mountain, following their best method using a mortar bed and slurry primer will ensure a long-lasting result and that’s exactly what I did in this collaboration.
(ad info: this was a paid brand collaboration. I chose all the products myself and worked really hard to install them and wouldn’t have done anything differently had it not been a collab as it went so well and I’m thrilled with my DIY porcelain patio! I always share my honest feedback and will flag any issues or lessons learned should they arise so you can be sure you are getting a useful guide.)
This step-by-step guide will walk you through the process of digging out your sub-base, laying your mortar bed, and fixing porcelain pavers securely to create a nice solid base that will stand the test of time.
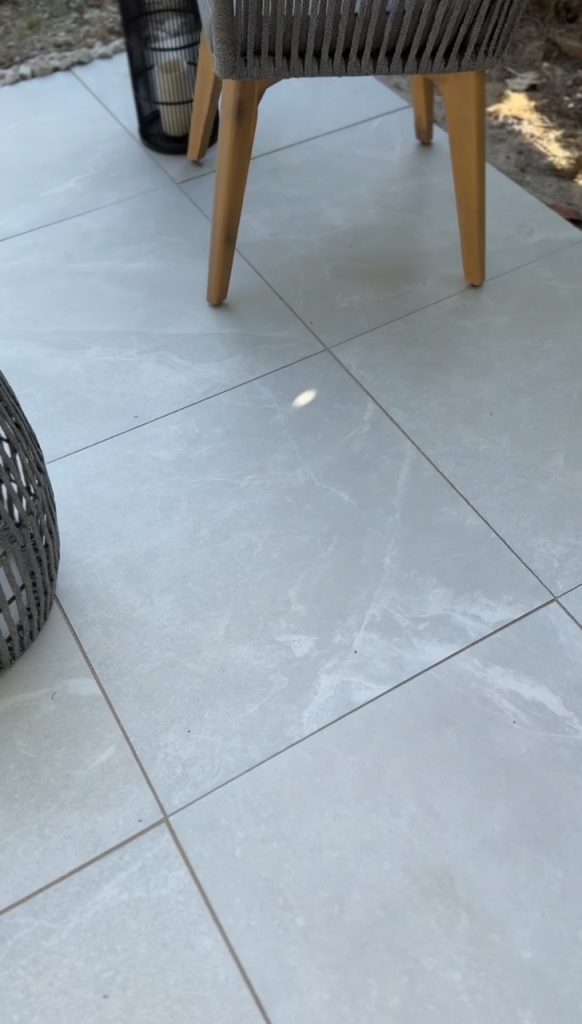
I used these beautiful Kansas white marble-effect porcelain tiles at only £22.99 per square metre.
This guide will ensure your diy porcelain patio is built to last and looks fantastic.
1. Planning and measuring your patio area
Planning is key to a successful diy porcelain patio, so be sure to consider the design and layout before you start. You need to think about the following aspects as a minimum…
- Location: consider the sun. as you don’t want to build it in a spot that only gets the sun at 8:00 am in the morning if you have a better alternative for example.
- Consider trees: will there will be any overhanging your patio? As they could drop leaves and berries, which will increase the ongoing maintenance.
- Check local planning restrictions: Different local authorities have different rules, so be sure that what you’re planning is allowed without any extra paperwork being submitted or permissions granted.
- Consider the shape of the patio: are you going for square, circle or rectangular.
Check your budget: is your budget realistic? Don’t forget to add in the cost of mortar, slurry, tile cleaner and sealer as well as tile clips and tools, it’s not just the cost of the tiles you need to cover.
Creating your own diy porcelain patio can save a fortune, as the labour is a huge portion of the costs. It’s worth researching properly before you start, as you need to be confident that you know exactly what you’re doing. I spent time looking up the common mistakes and pitfalls when building a DIY porcelain patio to make sure I mitigated them in my project plan.
Before you start any digging, measure out your new patio area in square metres (sq metres) so you know how much material you’ll need. Make sure you allow for at least a 5mm–10 mm gap between each slab for proper alignment and tile adhesive bonding.
Top tip: Allow for around 10% extra coverage when ordering porcelain slabs to account for cuts, breakages, and affected areas.
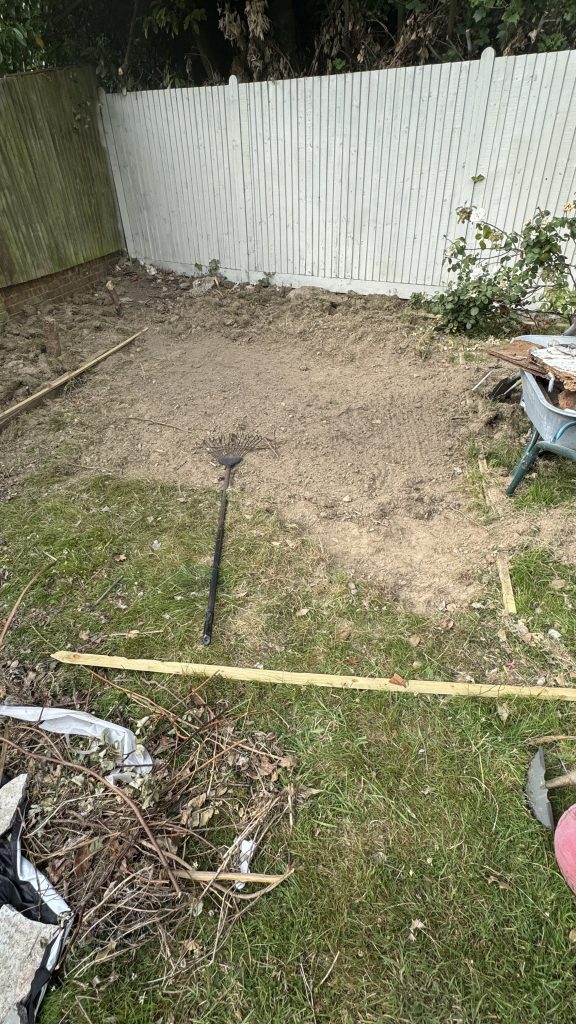
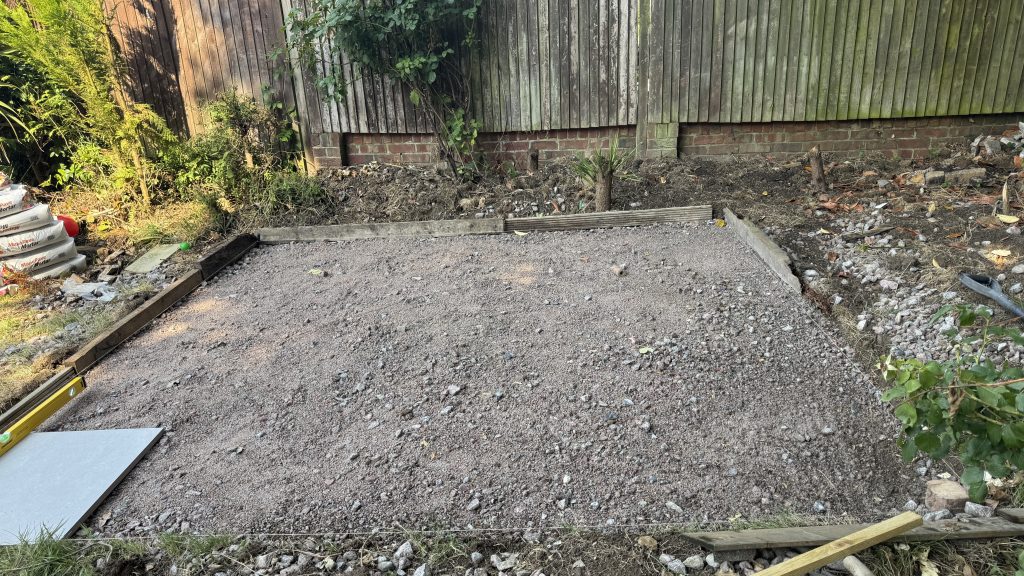
2. Excavating the base
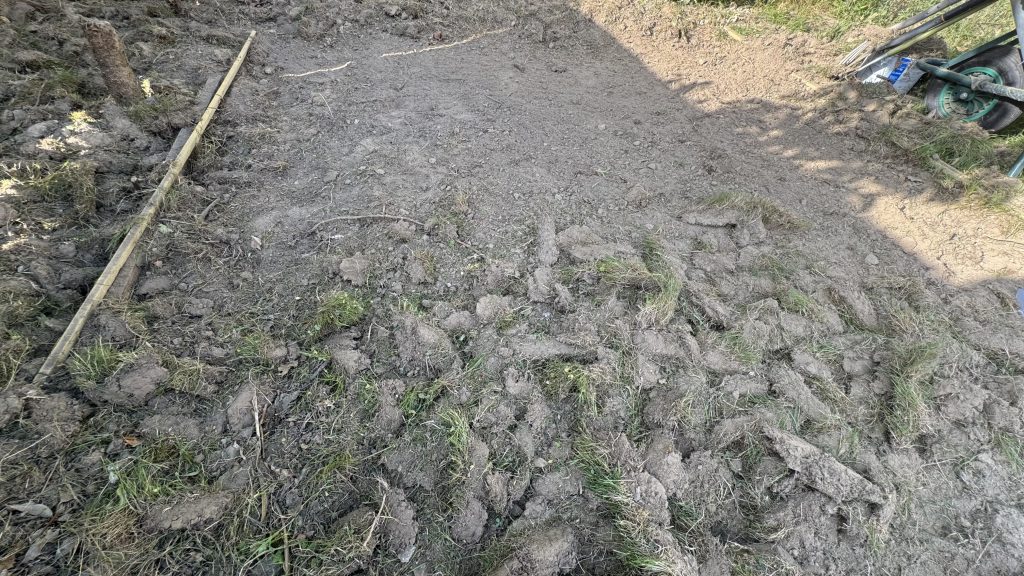
A well-planned diy porcelain patio can transform your garden, and the first step to making that happen is honestly quite exhausting! You can’t just lay the tiles on any surface; you need a proper sub-base to ensure they won’t move and crack over time. I decided to use MOT Type 1 stones and ordered a bulk bag from my local builder’s merchant, but more on that in a minute!
Use spray paint or string lines to mark out the area. Then dig down to a depth of around 150mm below your intended finished level. This allows space for your sub base, mortar bed, and porcelain pavers.
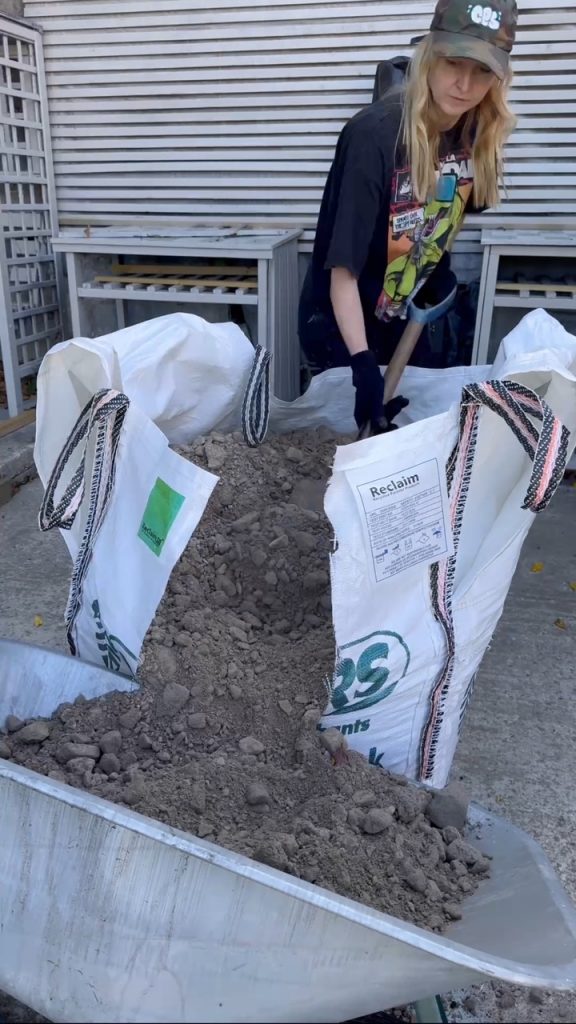
You’ll be removing a lot of soil, so have a plan for waste disposal. For larger outdoor projects, hiring a skip might be a good idea. I wanted my patio to be surrounded by beautiful cottage garden-style flowerbeds eventually, so the soil was needed to build up these beds and could simply be relocated for now.
Top Tip: Don’t forget the fall!
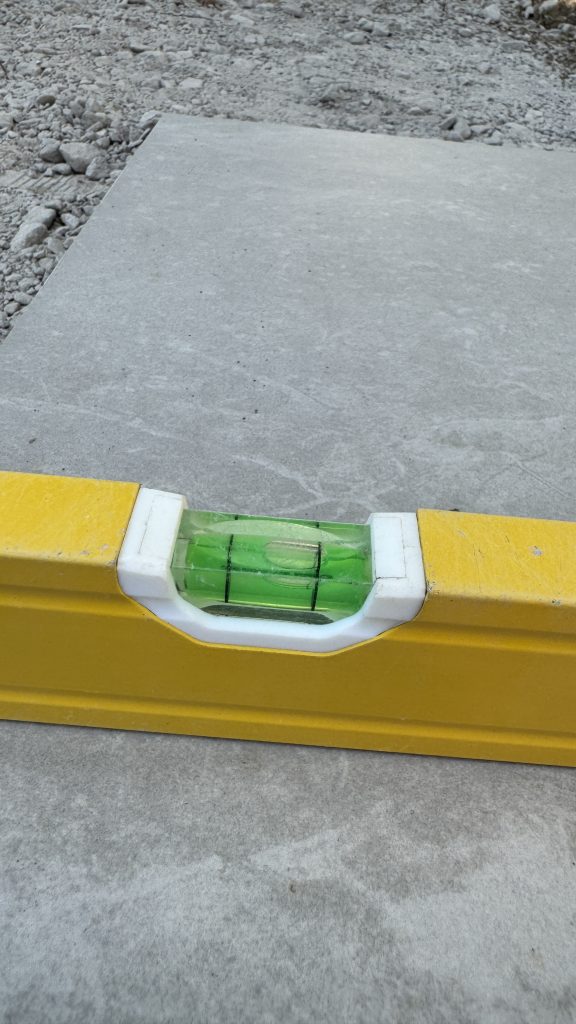
It’s really important to consider drainage when you build a patio as you don’t want surface water pooling and creating puddles. The way to avoid this is to build the patio on a gentle slope. I must admit, I found this concept a bit tricky initially as I’m so used to making sure everything is level in my DIYs! The idea is to have a gentle enough drop that you don’t notice it when you are standing or sitting on the patio, but enough that water will run off. The key is to ensure that the surface is completely flat (different to level ie flat means that all the slabs meet exactly and there isn’t a lip that stops the water draining and causing a puddle). I researched how much of a slope to add and the experts seemed to be saying a 1:60 or 1:80 drop was perfect for porcelain slabs. I plumped for 1:80 which means for every 80 units that you go along horizontally, you drop down one unit vertically eg If the patio was 80m long then there should be 1m difference in height at one end to the other. My little patio was only 3 metres wide so the drop only needed to be 3.75cm (300/80 = 3.75cm).
To create the fall you need to dig out the base to your required depth (I wanted the slabs to be slightly above the ground level so dug out a 10cm base) then dig down the extra amount for each metre, so the first metre should drop by 1.25cm (3.75cm / 3) the second metre should drop by 2.5cm (2 x 1.25cm) and the final metre the full 3.75cm. To check the levels as you are digging, it’s helpful to put a peg in with a string line at the surface of one end, extended to the other end of the patio completely on a level and you should be able to measure a 3.75cm drop from the string to the top of the soil. You can put pegs in at metre intervals to check the drop.
Finally, a great test is to put your long spirit level across the dug-out base and the bubble should be on the edge of the line instead of in the middle of the window as you’d be aiming for if you were trying to get it level. There are lots of helpful YouTube videos on digging the base out to include a fall so if this still sounds confusing then have a quick watch of them before you start.
3. Laying the sub base

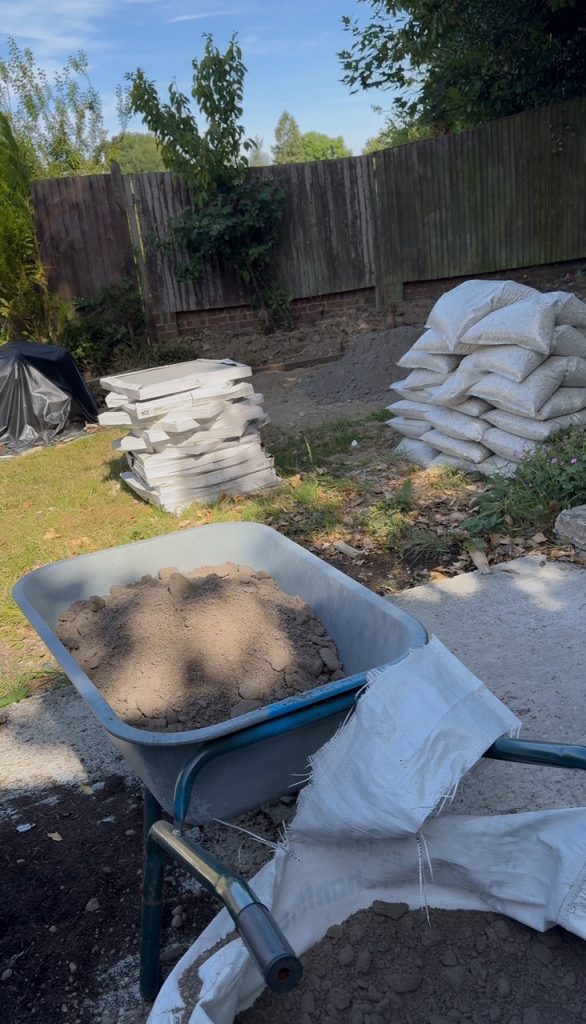
Once the area is excavated, it’s time to lay your MOT Type 1 sub base. This is made up of crushed limestone or granite, which creates a strong, compact foundation.
- Spread the sub base in layers of around 50mm.
- Compact each layer using a wacker plate until you reach your chosen depth. If you don’t have a wacker plate (I didn’t and I wasn’t going to hire one for a piddly 3m patio!) you can use a hand tamper, it’s a lot more manual labour but it does work. I had one of these tools from when I made the path down the side of the house last year so I cracked on and compacted the patio base by hand.
4. Preparing the mortar bed
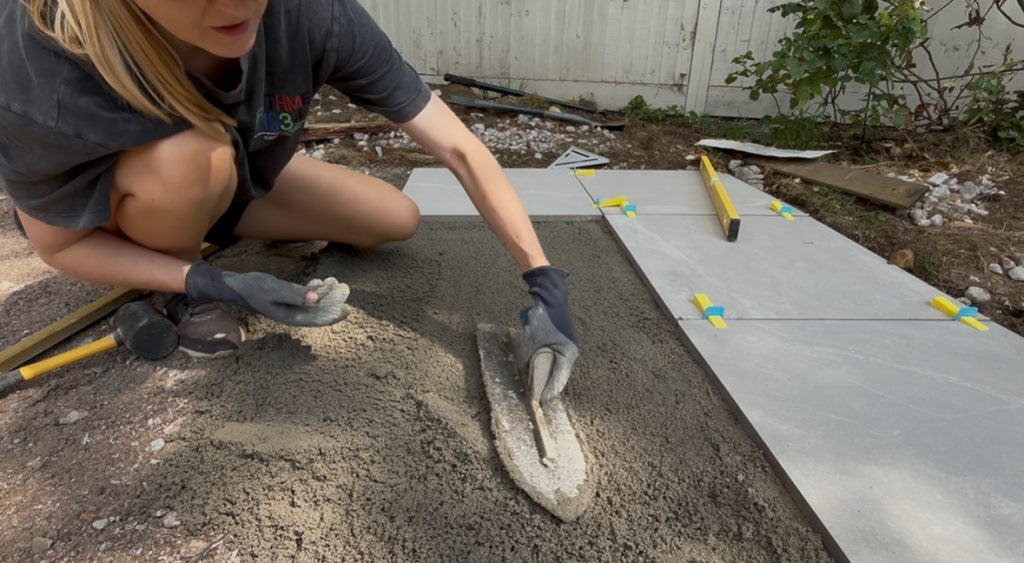
I opted to use the Mapepave mortar that Tile Mountain recommends for use with their 20mm porcelain tiles. It was super easy to use and comes in 25kg bags. Each bag covers an area of 0.4msq at a depth of 2.5cm thick, which is the recommended depth over a 10cm compacted base.
Rather than hire a cement mixer, I used my trusty heavy-duty paddle mixer that I’ve used for all my DIY resin-bound projects and a flexi-bucket. We found it was easiest to mix up one bag at a time and then spread it over a distance of 0.4 m². Each tile was 0.36m² so it was easy to calculate as it was just wider than the tile itself.
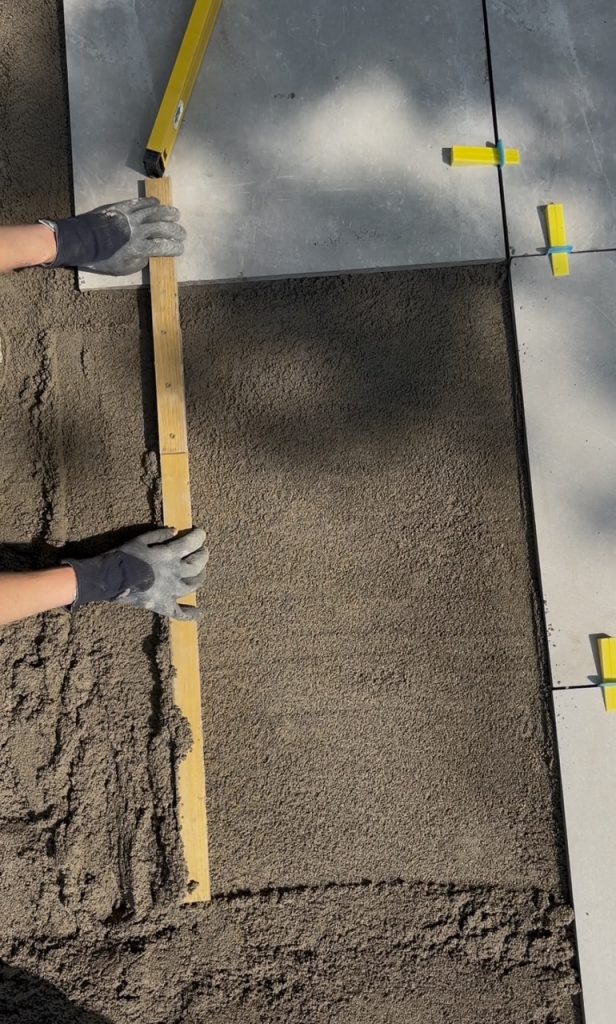

I made a little levelling tool by screwing two pieces of wood together, one was 2cm thick ( the depth of the tiles) and this meant I could easily run it along the top of the adjacent tile and it would automatically level the mortar bed ready for the next tile with no faffing about. It was probably the most satisfying part of the whole project! Take care not to bend it while you’re levelling or it won’t work effectively.
Tip: Only work in small areas at a time so the mortar doesn’t dry out before you’ve fixed your tile.
5. Priming the back of the tile with slurry
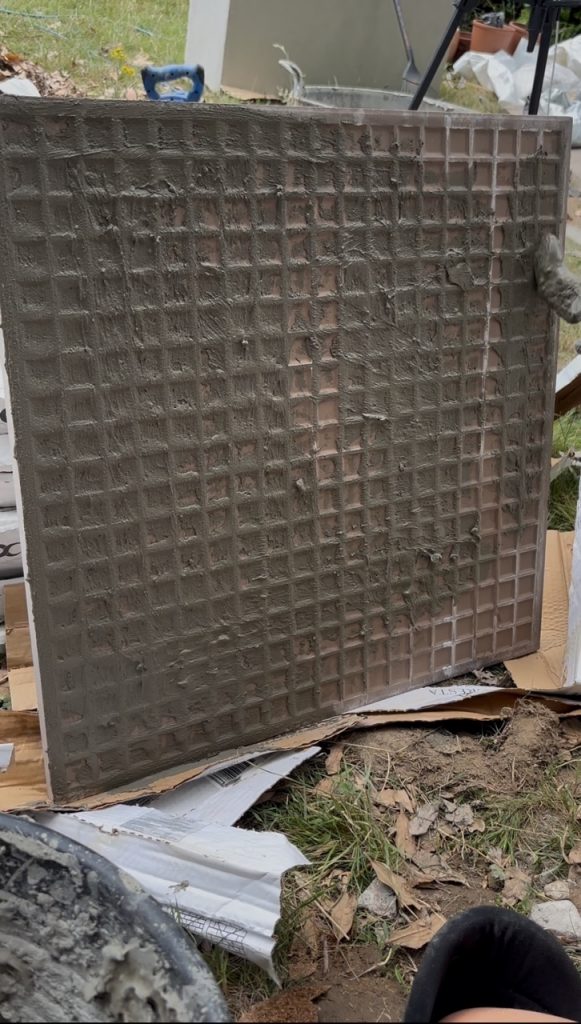
Applying a slurry primer is a crucial step in creating a lasting diy porcelain patio as it optimises the adhesion between the tile and the mortar bed.
Before laying each tile, apply a slurry primer to the back of the tile. This is a critical step recommended by Tile Mountain to ensure a strong bond between the porcelain slabs and the mortar bed. If you are using the Tile Mountain recommended product (the Mapepave slurry) then you should operate a wet on wet application by laying a thin layer of slurry over the mortar bed as well.
Top tip: Always apply the slurry immediately before fixing the slab – don’t let it dry beforehand.
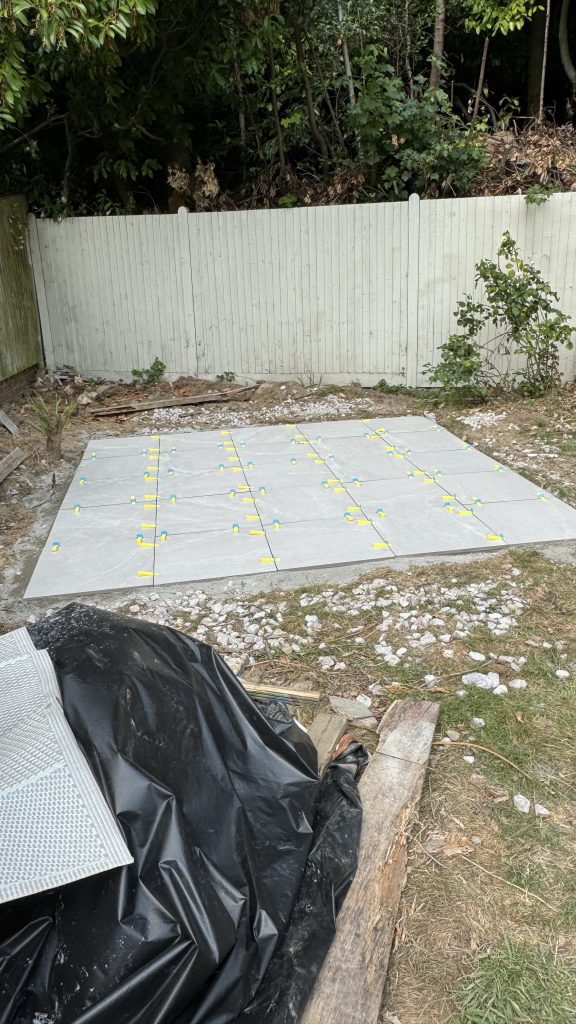
6. Laying your porcelain tiles
Place your first tile carefully onto the mortar bed, pressing down firmly with a slight twist. Use a rubber mallet to tap it level and ensure good contact with the mortar.
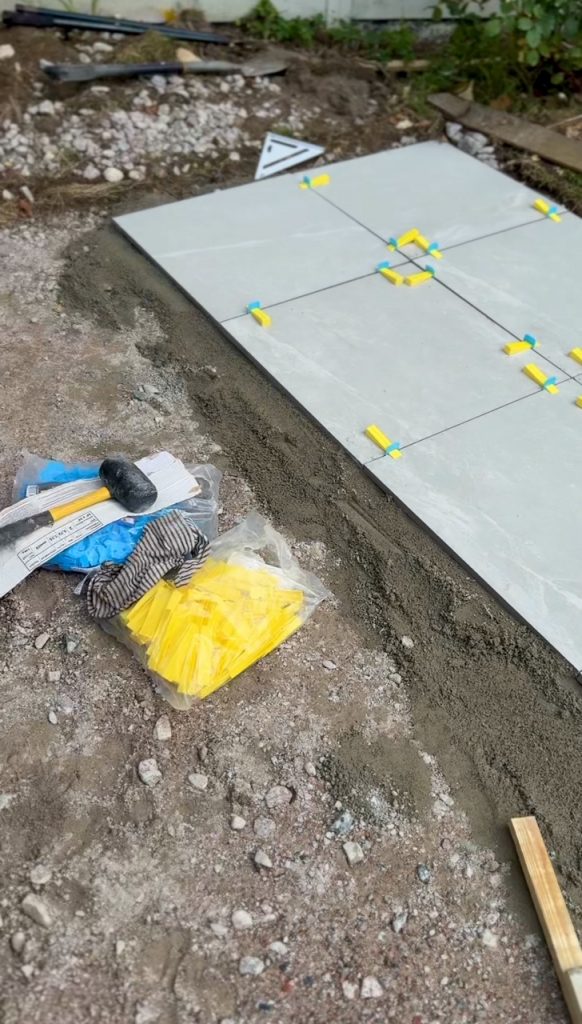
Check each slab with a spirit level (remembering that you want the bubble on the line not in the centre as you would for a level surface) and maintain a consistent mm gap between tiles using spacers. Work across the area methodically, adjusting as needed to keep the layout square.
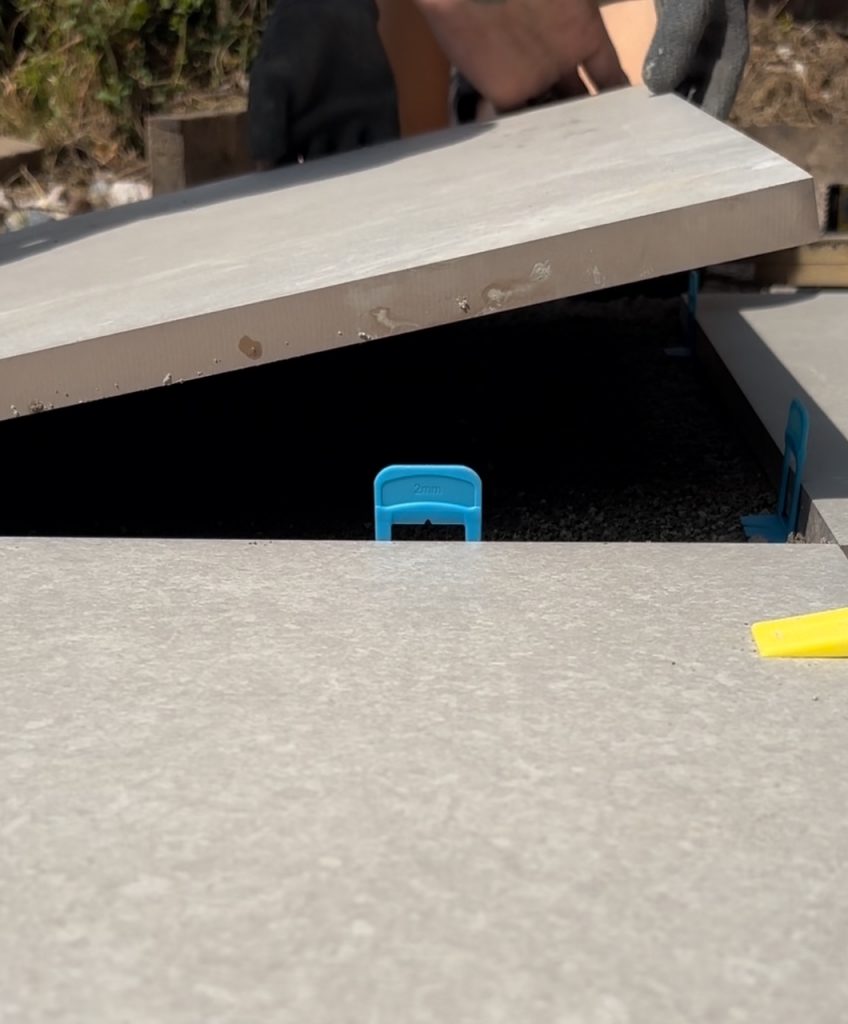
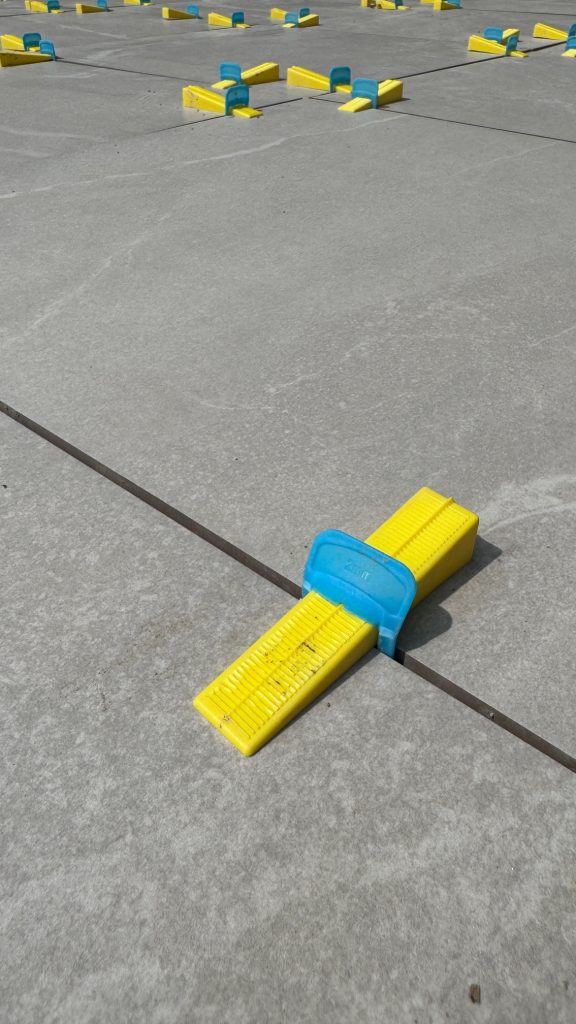
Tip: to avoid lippage (when you get unevenness where tiles meet and instead of being flat there is a lip up to the next tile) use tile levelling spacers. I used this wedge and clip system where the clips sit under the bottom edge of two adjacent tiles and come up between them with a clip that allows a wedge to push through tightly holding the tiles in exactly the right place until the mortar sets.
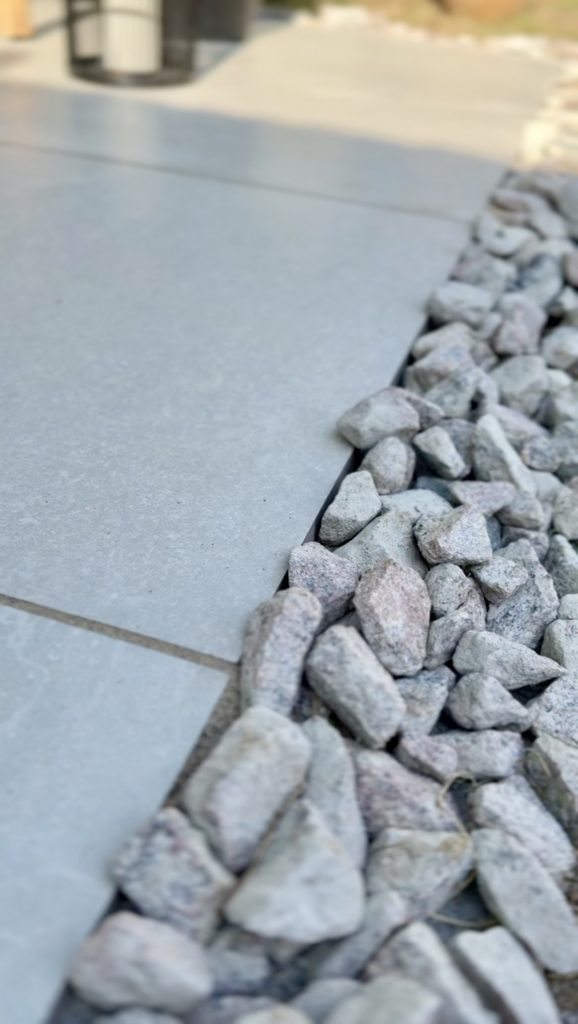
7. Finishing the grout joints

Once all tiles are set and fully cured (usually after 24–48 hours), it’s time to fill in the grout joints with an outdoor-grade tile grout.
For this project, I used a brush-in tile grout as recommended by Tile Mountain and it was honestly one of the easiest grouting experiences I’ve ever had! You wet the tiles and the gaps between them before brushing the sandy grout in then pushing it diagonally into the gaps so they are filled completely. If it starts to dry out, you can apply a little more water then brush off the excess and that’s it – AMAZING!!!
Top tip: Avoid grouting on very hot or very wet days. The best method is to grout in mild, dry conditions to give your joints sufficient time to cure properly.
8. Final cleaning and sealing
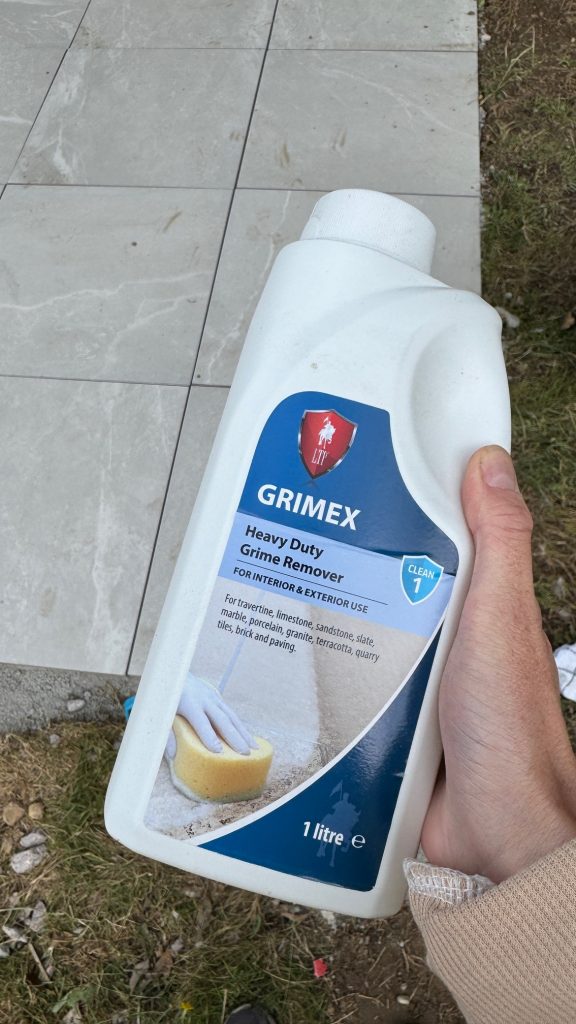
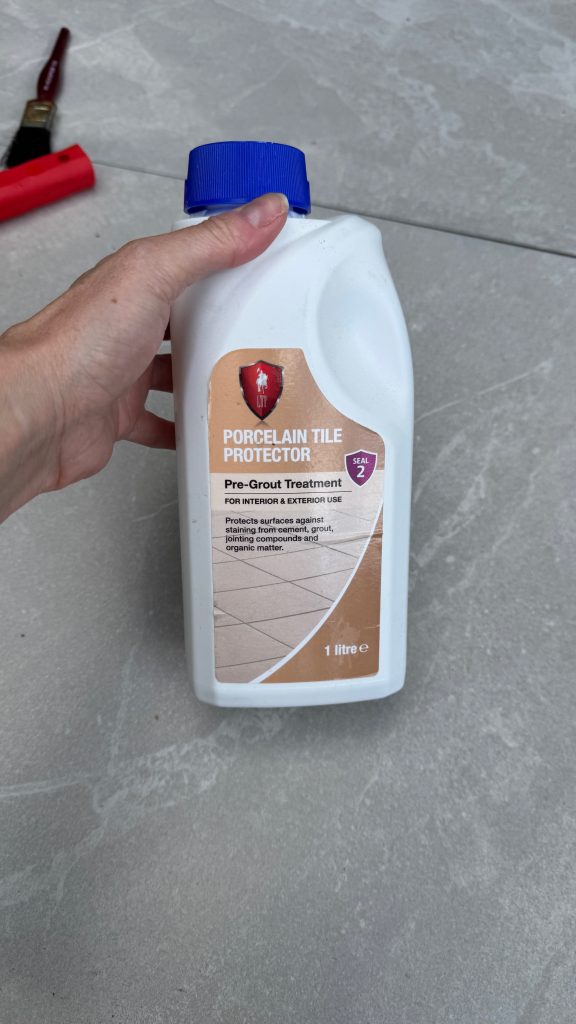
With proper care, your diy porcelain patio will serve you well for many years but you do need to make sure that you clean and seal the tiles at the end of the installation. I used this amazing cleaner called Grimex. You dilute it and then wash the tile surfaces and they come up so clean and pristine. You wash it off then dry the tiles before applying two coats of a porcelain tile protector to make ongoing maintenance an easier task.
Routine cleaning with water and a patio brush is usually enough to keep your porcelain patio looking fresh.
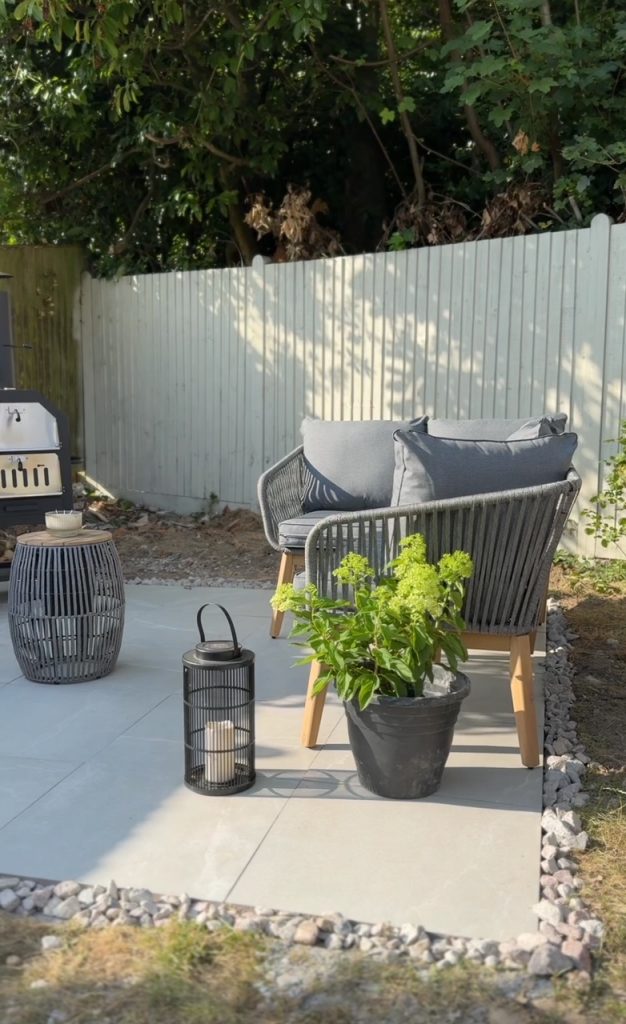
DIY porcelain patio – an achievable weekend project
Laying your own porcelain patio isn’t just possible, it’s incredibly rewarding. The key factors are solid prep work, a proper mortar bed, the use of slurry primer, and ensuring a nice, solid base to support your tiles for years to come.
If you’re unsure or working on a large space, a professional installer may be a wise investment, but for small to medium outdoor projects, DIY installation is absolutely achievable with the right process and materials.
Other posts you might enjoy…