Do you know these must-have DIY tools?

Whether you’re a beginner or a seasoned pro, having the must-have tools for DIY at your disposal can make the difference between a project’s success and failure. I know only too well the trauma of trying to complete a job without the right tools, which adds time and often reduces the quality of the overall finish. I also know that it can be quite overwhelming to decide which tools to invest in when you are just starting out in the world of DIY.
When you’re searching for the best budget power tools, it’s easy to get sucked into buying loads of gadgets you don’t actually need. On the one hand, you want a variety of tools but don’t want to buy unnecessary ones as they all cost money, and DIY can get expensive. On the other hand, you don’t want to cheap out and buy seemingly good-value tools only to find out that they are poor quality and need replacing quickly. Sound familiar? Then you’ll be glad to hear that I’ve made lots of mistakes already and am happy to share the benefit of my experience to save you from learning the hard way, too!
There are so many power tool brands out there now, from affordable options aimed at light DIY projects right through to professional tools designed for tougher jobs and construction site use. My advice is always to buy the best value tools you can comfortably afford and build your collection slowly over time rather than buying huge combo kits you won’t fully use.
What are the top 20 must-have DIY tools?
In this guide, I’ll whizz through the top 20 must-have tools, including the best budget power tools that every DIY enthusiast should consider adding to their collection.
1. Tape measure

Accurate measurements are the cornerstone of any DIY project. A reliable tape measure ensures precise cuts and placements, essential for tasks ranging from simple repairs to complex constructions. My personal favourite model is a top-reader tape measure. It allows you to measure the exact dimensions of alcoves and internal spaces. The dimensions are shown on the top of the case and take into account the length of the body.
2. Cordless drill & drill bits

A cordless drill is one of the most essential tools you can own and probably my top pick when people ask me about the best budget power tools for beginners. A good cordless drill set serves multiple purposes, from drilling holes to driving screws. Its portability and ease of use make it indispensable for various home projects and light-duty projects around the house.
Power drills make light work of drilling through wood, brick and plaster. By inserting screwdriver bits into your drill, you transform it into a handy electric screwdriver, increasing its versatility. Modern cordless drills often come with variable speed settings, a compact design and much better battery life than older models too.
I love my hammer drill as it has various settings to select depending on the task you are working on (hammer/drill & screwdriver). I picked up a Ryobi starter set for under £100 which came with replacement battery packs and a charging station, making it one of my personal best buys. Most now use a lithium-ion battery or 20-volt battery system which tends to last a long time between charges.
I recommend looking out for great deals in your local DIY store or on Amazon as you can often save a packet. Big-box stores like Home Depot often have seasonal offers too if you’re reading from the US.
3. Saw
A saw is one of the most essential of the basic hand tools. The types of projects you plan to tackle and the frequency you plan to use them will determine which saw to choose. Handsaws are usually fine if you are starting out and don’t want the expense of an electric saw.
Handsaws are often smaller, lighter, and easier to store, which is another advantage. They are also easier to use when you are starting out, although they require more effort and elbow grease. So, they might not be ideal when you have a large project with lots of cuts to complete or when you are cutting through chunky pieces of timber, which will require a lot of effort.
As your confidence grows, you might decide to branch out into more specialist power tools like mitre saws, track saw options or even one of the best circular saws for woodworking projects, but I genuinely think most beginners can start small and build up gradually rather than buying every tool at once.
These are the saws that I use and recommend…

General-purpose wood saw
I always have one of these in my toolbox as they are so quick and easy to use and take up little storage space. B&Q usually do a ‘2 for £10’ offer which makes them super affordable too.
Mitre box with tenon saw

When it comes to installing DIY panelling, a mitre box and saw is the cheapest and easiest way to get accurate mitre cuts.
The only downside to using a plastic mitre box is that you can accidentally shave a little off the plastic edge when you make your cuts which over time makes the mitre box less accurate; the other possible issue is that standard mitre boxes aren’t very tall, which is fine for panelling but can be an issue if you are working on tall skirting boards. I wrote a tutorial on how to make a tall, wooden mitre box in case this is useful. If you are working on skirting boards, you might like to read my guide on how to get the perfect joins.
Jigsaw

Once you start DIYing regularly, it’s worth investing in a power saw. You can pick up reliable ones for as little as £30-40. They are great for cutting quickly through larger pieces of wood. A jigsaw saves a lot of time and effort and has to feature on my must-have DIY tools list. This is a good entry level one…
I haven’t cut metal with it (there are different blades for wood and metal), but I have used it for a wide range of tasks and it worked a treat.
If you are planning to do a lot of woodwork projects, then you might want to opt for a more expensive professional tool, but for the average DIYer it’s great value.
4. Claw hammer

When it comes to driving and removing nails a claw hammer is an indispensable tool. Its versatility and ease of use make it a favourite among DIYers. I have a mini claw hammer which is very light and manoeuvrable, perfect for using in tight spaces and ideal for tasks such as hammering rawl plugs into a wall and installing panel pins or small nails.
For heavy-duty hammering, it’s worth getting a mallet or full-size hammer, but as I tend to work with screws rather than nails and use a brad nailer when I do want nails, a huge heavy hammer isn’t on my frequently used list.
5. Utility knife aka Stanley knife

From cutting through different materials to precise trimming, a utility knife is a must-have tool for any DIY enthusiast. Its usefulness spans across various projects, making it an essential addition to your toolbox. I’ve used utility knives on each of the following projects… Cutting foam on upholstery projects like the DIY footstool or DIY headboard. Removing carpets, hanging wallpaper, adding wallpaper to wall panels and even squaring off the corners on microcement projects are other examples of when a utility knife comes into its own.
6. Stud finder

A stud finder can literally save your life by preventing you from drilling into electrical cables and can save you a world of hassle by letting you know where pipework is located insider the walls you want to drill into. As well as the safety aspects, stud finders help locate studs behind walls accurately, ensuring secure installations of shelves, cabinets, and mirrors for example. You don’t need to spend a fortune on this must-have DIY tool as even the basic, entry-level ones do the job adequately, helping you out. Read my article on how to use a stud finder for all the tips and tricks.
7. Screwdriver set
A comprehensive screwdriver set with various sizes and types of screwdriver bits is essential for tackling a wide array of DIY tasks, from assembling furniture to fixing appliances. I tend to use PZ2 (pozidrive 2) screws, so use the corresponding screwdriver most frequently. It’s a good idea to have a whole range of screwdrivers in your toolbox as you’ll find flatpack furniture sets and the like often come with specific screws like slotted (flathead) or hex (allen) keys. Manual screwdrivers are affordable, easy to use and store.
Electric screwdrivers are handy but I found the very cheap ones to be a bit weak especially compared to using screwdriver bits on a drill in screwdriver mode.
8. Sander
There is a high chance that you’ll need to do some kind of sanding if you are completing a lot of DIY projects as it’s a necessary evil. You can usually start off quite happily with a few sheets of sandpaper in various grits and use them with a block of wood or a specialist sanding block.
However, once you start sanding regularly or if your sanding project is located inside your house, then the better option will usually be a power sander with some kind of dust extraction. Sanding can get ridiculously dusty and it’s bad for you to breath in the dust particles so attaching a vacuum to your power sander is always a good idea if you can.

A mouse sander is the perfect entry-level power sander as is small but packs a punch when it comes to small sanding projects. You can pick one up for about £20 and I definitely recommend one if you have more than a little sanding to do because you can attach a vacuum hose to the back of the sander to collect the dust and it saves a lot of effort. You need to buy mouse-shaped sanding pads which attach with velcro. If you have a large project or you sand regularly then I’d skip this and move straight to the random orbital sander below. Otherwise, this is a brilliant investment.
Random orbital sander

Achieving smooth and polished surfaces is made effortless with a random orbital sander. Its ability to remove material efficiently makes it invaluable for finishing touches on woodworking and home improvement projects. I picked up my orbital sander for around £50 and it’s so much more powerful than the mouse sander that it makes light work of sanding large areas like tabletops, doors and bookshelves.
9. Nail gun (brad nailer) staple gun
A brad nailer or staple gun can save you so much time on DIY projects like panelling, upholstery and trim work. Once you start using one, you’ll wonder how you managed without it. For regular DIYers, this is one of those essential tools that speeds everything up massively.

10. A spirit or laser level
A spirit level is indispensable for ensuring straight lines and accurate alignments. Whether you’re hanging picture frames or installing shelves, a spirit level will see you right and there’s nothing more annoying than completing the job to stand back and realise you’ve put something on the wonk!

A spirit level is indispensable for ensuring straight lines and accurate alignments. Whether you’re hanging picture frames or installing shelves, a spirit level will see you right and there’s nothing more annoying than completing the job to stand back and realise you’ve put something on the wonk!
Do I need a laser lever?

When you are starting out, you don’t need to buy a laser lever straight away, a standard spirit level is cheap and easy to get hold of, perfect for occasional DIYers and a toolbox staple for regulars. I recommend getting a longer spirit level if you can, as the tiny, lightweight plastic ones can be inaccurate (I discovered that the hard way!).
A laser level is a good idea if you complete regular home improvement projects and is worth the money. You can buy an entry-level laser level for around £20-30 and they are self-calibrating and reliable. I use mine by attaching it to my camera tripod, but you can stand the level on a pile of books or a table/worktop if you don’t have a tripod.
If you’re comparing the best budget power tools, I honestly think a laser level is one of the best value additions once you move beyond basic light DIY projects because it improves accuracy so much and makes jobs quicker too.
11. Putty knife
A large proportion of DIY is focused on the prep work. Prepping walls, floors, doors, ceilings etc before painting, skimming, wallpapering or panelling so a putty knife is a super handy tool as can remove lumps, bumps, wallpaper, and imperfections from the wall’s surface before being used to apply filler to smooth out.
Skimming spreader

I have to add a note here about my skimming spreader. Although this isn’t a must-have toolbox essential for everyone, it definitely is for those starting out with skimming/ plastering or microcement projects on their agenda. This tool makes life so easy when you want to smooth a surface, as I did when I smoothed over my artex textured ceiling or applied a skim-coat to my walls. I bought mine from concretelab.co.uk (ad you can get 10% off with the code CDS10).
12. Clamps

These clamps are so handy to have in your kit and had to feature in the must-have DIY tools list because I use them all the time. Perfect for steadying a piece of wood when you need to cut or drill into it. I use these DIY clamps all the time, but some recent projects where they were super helpful were, DIY marble side table, DIY marble tile splashback, DIY footstool.
Top Tip: You can clamp the mitre box we saw earlier to a table or workbench to get more accurate cuts.
13. Safety glasses

It’d be remiss of me to recommend a bunch of tools and not add safety glasses to the list! I always use safety goggles when I’m using a jigsaw or tile cutter to protect against flying debris and shrapnel.
14. Dust mask

There’s no denying that DIY work is often dusty and dirty with fumes being a frequent challenge from paints, primers, sealants etc. A good quality mask is worth it’s weight in gold as will prevent you from breathing in particles that can irritate and harm your airways.
15. Paintbrush and roller

I guess this is slightly cheating, as technically, a paintbrush and roller set are separate DIY must-haves, but they work together, and I’d rarely complete a DIY painting project without using both in some way, so I decided to bundle them into one.
I love the Harris brushes from Amazon as they are really good quality, but not so expensive that you are scared to use them. I tend to wrap my brushes in cling film or foil overnight rather than wash them out during painting projects and would feel bad about doing this if they were mega expensive ones!
16. Impact driver
An impact driver is one of those tools that you don’t realise you need until you try one. If you regularly work with long screws, build furniture, install decking or tackle woodwork projects, they make life so much easier.
Compared to a standard drill, impact drivers deliver much more power when driving screws into tough materials and they’re brilliant for reducing wrist strain too. I still think a cordless drill should be your first purchase, but once you start taking on bigger home projects, an impact driver becomes a really handy upgrade.
17. Circular saw
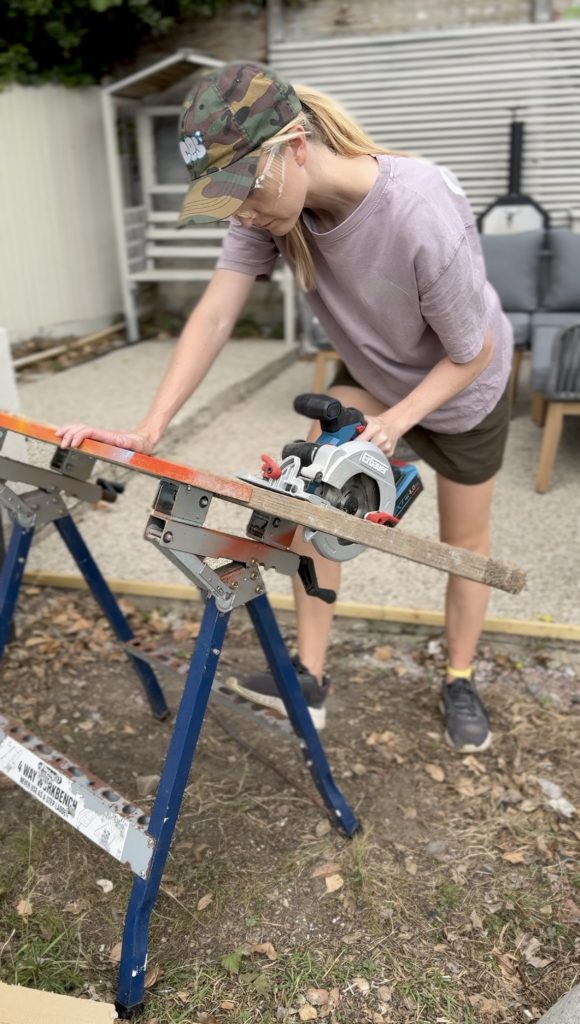
If you regularly cut MDF, timber, shelving or worktops, a circular saw can save you a huge amount of time. I know power saws can look intimidating initially, but modern cordless tools are much easier to use than you might think.
Some of the best circular saws now have compact designs, adjustable depth settings and safety features that make them ideal for DIYers rather than just professional contractors.
If you’re on a tight budget, I’d recommend starting with a budget-friendly model before upgrading later. Unless you’re using it daily on a construction site, you probably don’t need the most expensive professional tool.
18. Multi-tool
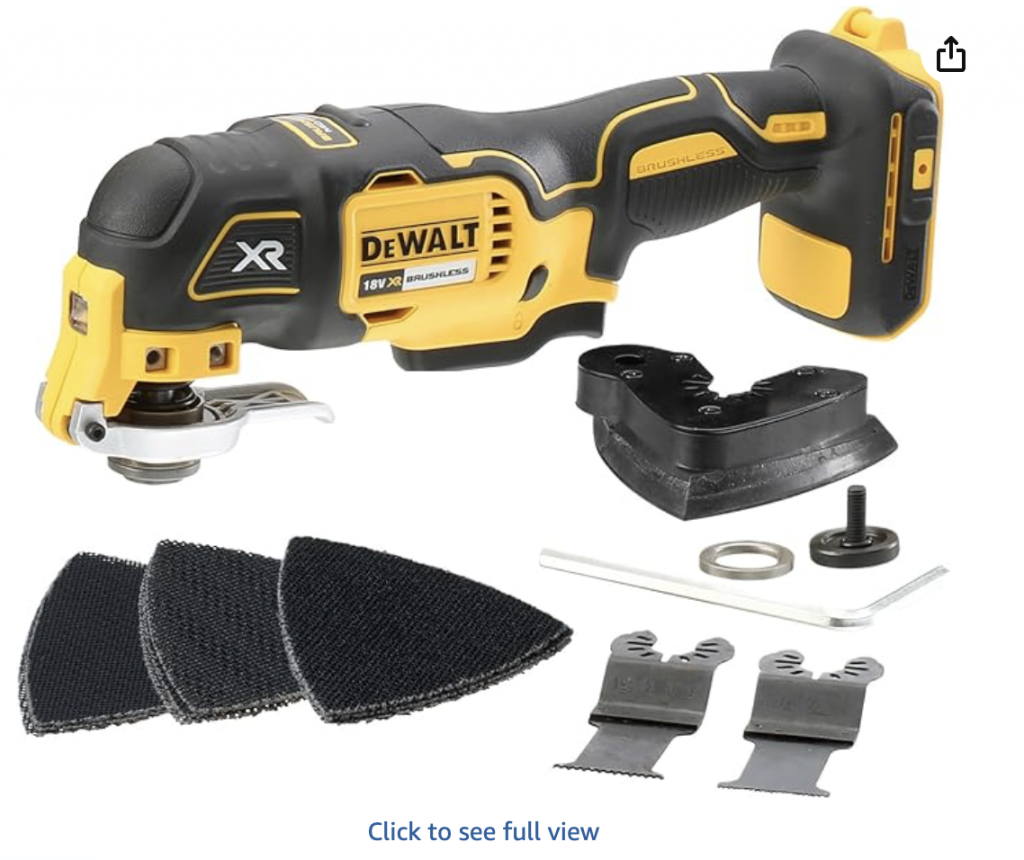
A multi tool has become one of my most-used power tools because it can tackle such a wide range of tasks. From trimming skirting boards and cutting awkward corners to sanding tight spaces and removing grout, it’s one of those tools that earns its keep very quickly.
It’s particularly handy for renovation work because it gets into places larger tools simply can’t reach. If I had to recommend one underrated DIY purchase, this would probably be it.
19. Paint sprayer

If you tackle a lot of decorating projects, then a paint sprayer can be a real game-changer. I put off buying one for ages because I assumed they were only for professional contractors, but honestly, they make painting fences, garden rooms, furniture and even walls so much faster. I wrote a whole separate blog post review which you can read here if useful…
For larger home projects, a paint sprayer gives a much smoother finish than a brush or roller and saves a huge amount of time too. You do need to spend a bit of time prepping properly and masking areas off, but once you get the hang of it, they’re surprisingly easy to use.
If you’re looking at the best budget power tools for decorating, this is definitely one worth considering, especially if you regularly paint large areas.
20. Leaf blower
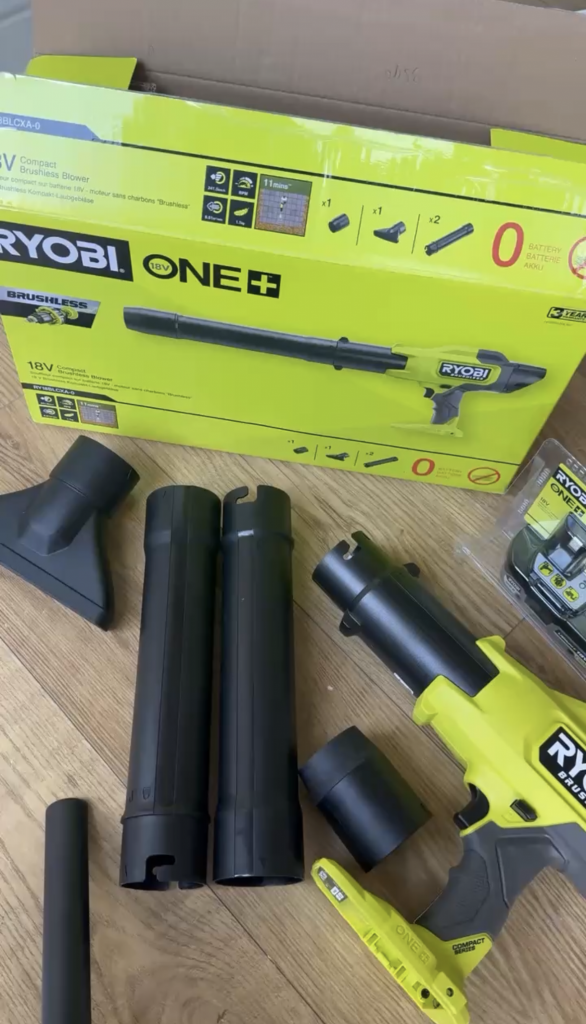
I know a leaf blower sounds a bit random in a DIY tools list, but hear me out because mine gets used constantly. Obviously, it’s brilliant for clearing leaves and garden debris, but it’s also really handy after messy DIY jobs outdoors too.
I use mine after sanding projects outside, cutting wood on the driveway and cleaning up after garden renovations. It saves so much sweeping and makes tidying up much quicker.
There are loads of affordable cordless tools available now with decent battery life and compact designs, making them ideal for regular home maintenance without spending a fortune. If you already own cordless drills or other battery-powered tools, it’s often worth sticking with the same power tool brand so you can swap batteries between tools and save money. I wrote a whole post about my affordable cordless leaf blower here.
Must-have DIY tools: building a toolkit with best budget power tools
As beginner DIYers, the journey into the world of crafting and fixing can be both exciting and daunting. Power tools like the mitre saw and power drill might seem intimidating at first, but they open up endless possibilities for projects of different sizes and materials and make your life so much easier that it’s worth taking the leap.
There are loads of major brands out there now, from Makita and Milwaukee through to more affordable DIY-focused ranges. Some people swear by brushless tools because the brushless motor technology tends to offer better battery life and more power, especially for tougher jobs, but I honestly think beginners can achieve brilliant results without spending a fortune.
You also don’t need every tool under the sun. Things like impact drivers, impact wrenches, angle grinders and leaf blowers all have their place, but for most home projects, starting with the essential tools above will cover a wide range of tasks.
Investing in the right power tools and hand tools over time will equip you with versatile tools that serve you well across all kinds of projects. Start with a basic set, keep an eye out for the best price and great deals, and add to your toolkit gradually as your confidence grows. Ultimately, the best tool brand is the one that suits your budget, storage space and the type of projects you actually enjoy doing.
Where next?
Below are some other tools-related posts you might enjoy
Paint hacks
Scroll to the very bottom to join my mailing list, where you’ll receive my monthly(ish) newsletter, packed with home improvement ideas and inspo.


